Imagine controlling your smart home devices, running server applications, or troubleshooting your projects without being physically present. With the power of Windows 10 and a few simple tools, you can securely access your Raspberry Pi from anywhere in the world. Whether you're a hobbyist, a developer, or simply someone who loves tinkering with technology, this guide will walk you through the process of setting up remote access to your Raspberry Pi, ensuring you stay connected no matter where you are. In this article, we’ll explore everything from configuring your Raspberry Pi to leveraging Windows 10's capabilities, all while maintaining security and optimizing performance. Remote access to your Raspberry Pi opens up a world of possibilities, allowing you to manage your projects, run scripts, or even host websites without needing to be physically near your device. Windows 10 offers a robust platform for achieving this, thanks to its compatibility with various remote access protocols and tools. Whether you’re troubleshooting an IoT project or monitoring a home server, the ability to connect to your Raspberry Pi from anywhere can save you time and effort. This guide will not only show you how to access Raspberry Pi from anywhere on Windows 10 but also ensure that your connection is secure, stable, and efficient. By following the steps outlined here, you'll be able to harness the full potential of your Raspberry Pi without being tied to a specific location. As we delve deeper into this topic, you'll discover how to prepare your Raspberry Pi for remote access, configure your network settings, and use tools like SSH, VNC, and port forwarding to establish a seamless connection. We’ll also cover troubleshooting tips and best practices to ensure your remote access setup is both reliable and secure. Whether you’re a beginner or an experienced user, this article will equip you with the knowledge and tools to confidently manage your Raspberry Pi from anywhere. So, let’s get started on this journey to unlock the full potential of your Raspberry Pi with the power of Windows 10.
Table of Contents
- What is Raspberry Pi and Why is Remote Access Important?
- How to Prepare Your Raspberry Pi for Remote Access?
- What Network Settings Should You Configure for Remote Access?
- Tools and Protocols to Access Raspberry Pi from Windows 10
- How to Use SSH to Access Raspberry Pi from Windows 10?
- Setting Up VNC for a Graphical Interface
- What is Port Forwarding and How Does It Work?
- Troubleshooting Common Issues
- Frequently Asked Questions
What is Raspberry Pi and Why is Remote Access Important?
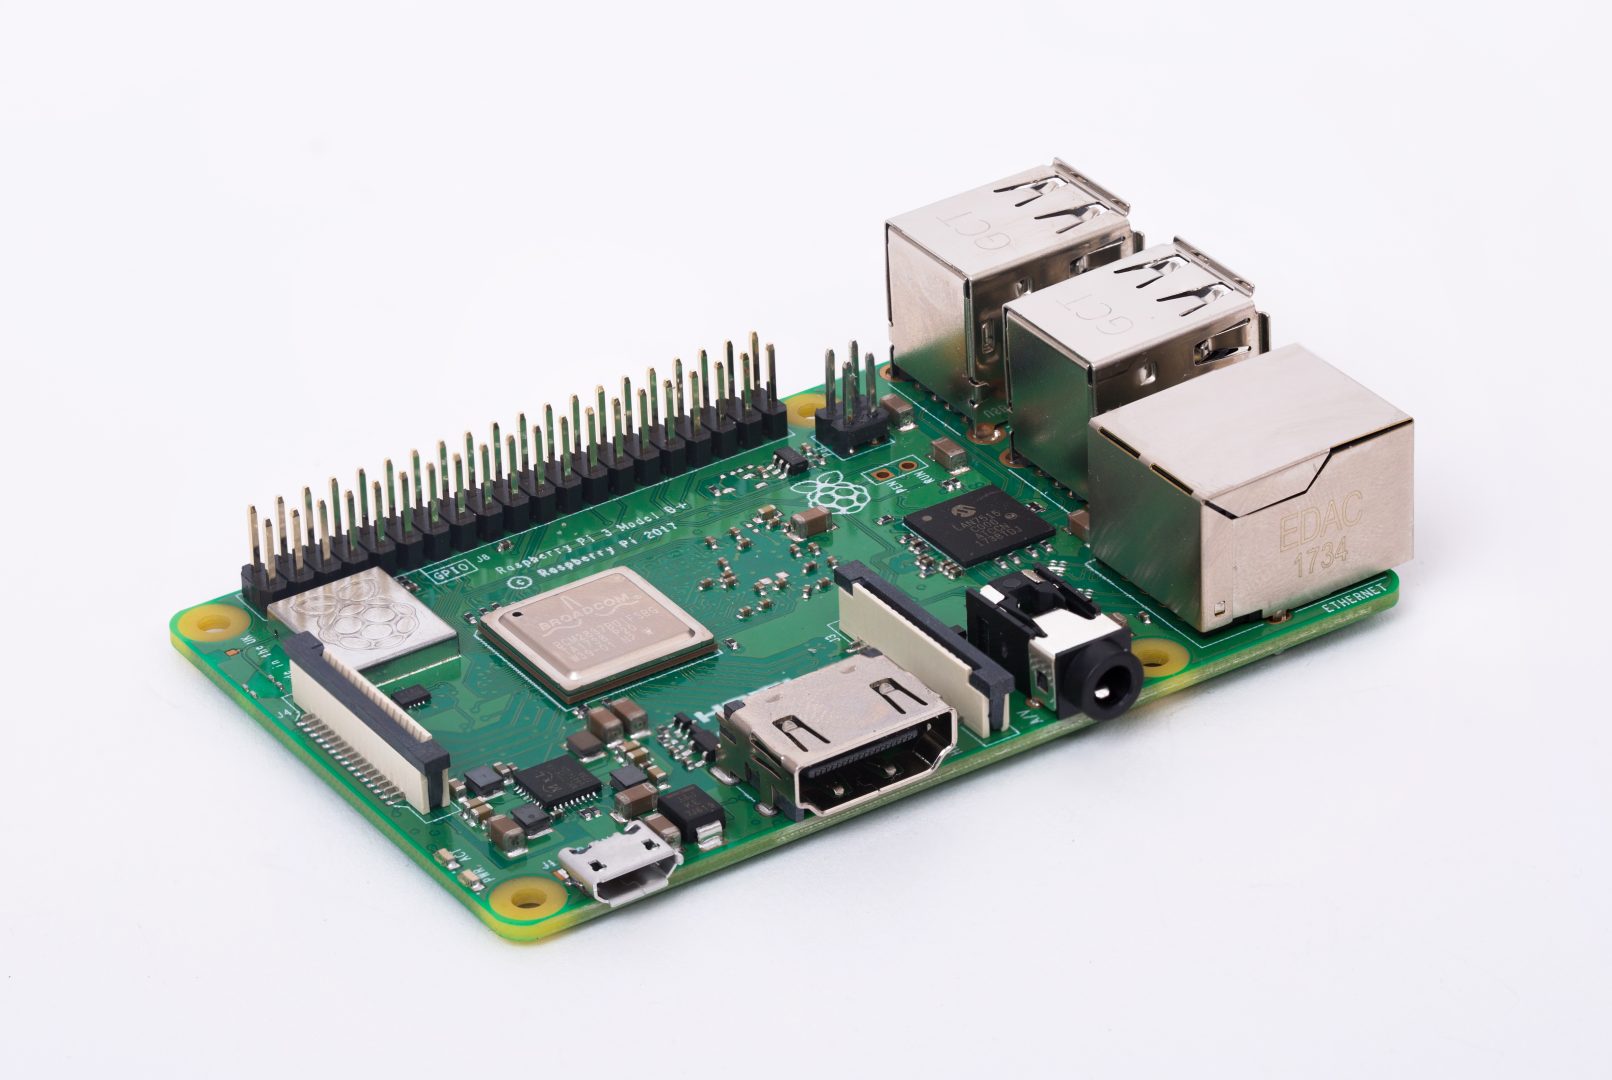
The Raspberry Pi is a credit-card-sized single-board computer that has gained immense popularity among hobbyists, educators, and developers. Designed by the Raspberry Pi Foundation, this versatile device is capable of performing tasks that would typically require a full-sized computer, such as running operating systems, hosting websites, and controlling IoT devices. Its affordability, compact size, and low power consumption make it an ideal choice for a wide range of projects. Whether you're building a home automation system, a media server, or a retro gaming console, the Raspberry Pi offers the perfect platform to bring your ideas to life. Remote access is a critical feature for anyone using a Raspberry Pi, as it allows you to interact with your device without being physically present. This capability is particularly useful when your Raspberry Pi is deployed in hard-to-reach locations, such as behind a TV or inside a server rack. By enabling remote access, you can troubleshoot issues, update software, or even run scripts from the comfort of your Windows 10 computer. Additionally, remote access enhances productivity by allowing you to manage multiple Raspberry Pi devices from a single location, saving time and effort. It also ensures that you can respond quickly to any issues that arise, minimizing downtime and maximizing efficiency. In today’s interconnected world, the ability to access your Raspberry Pi from anywhere is more important than ever. Whether you're traveling, working from home, or simply away from your desk, remote access ensures that your projects remain operational and accessible. By leveraging tools like SSH, VNC, and port forwarding, you can securely connect to your Raspberry Pi from your Windows 10 machine, regardless of your location. This flexibility not only enhances your ability to manage your projects but also opens up new possibilities for innovation and creativity. With remote access, the only limit is your imagination.
How to Prepare Your Raspberry Pi for Remote Access?
Before you can access your Raspberry Pi from anywhere using Windows 10, it’s essential to ensure that your device is properly set up for remote connections. The preparation process involves several key steps, starting with installing the appropriate operating system. The most common choice for Raspberry Pi is Raspberry Pi OS (formerly Raspbian), which is lightweight, user-friendly, and optimized for the device’s hardware. To install the OS, download the Raspberry Pi Imager tool from the official website, select the desired OS version, and flash it onto a microSD card. Once the installation is complete, insert the card into your Raspberry Pi and boot it up. After setting up the operating system, the next step is to enable remote access features. Begin by connecting your Raspberry Pi to a monitor, keyboard, and mouse for initial configuration. Open the terminal and type sudo raspi-config to access the configuration menu. Navigate to the "Interfacing Options" section and enable SSH (Secure Shell), which allows you to control the Raspberry Pi via a command-line interface. If you prefer a graphical interface, enable VNC (Virtual Network Computing) as well. These protocols are essential for remote access and will form the foundation of your connection setup. Additionally, ensure that your Raspberry Pi is connected to the internet via Wi-Fi or Ethernet, as a stable network connection is crucial for remote access. Finally, take steps to secure your Raspberry Pi before enabling remote access. Change the default username and password to something more secure, as leaving them unchanged can make your device vulnerable to unauthorized access. You can also configure a firewall to restrict access to specific IP addresses or networks. If you plan to use SSH, consider setting up key-based authentication instead of relying solely on passwords. This adds an extra layer of security by requiring a private key to log in. By preparing your Raspberry Pi with these steps, you’ll create a solid foundation for remote access, ensuring that your device is both functional and secure.
Read also:Mastering The Art Of Rap Essential Rap Writing Tips For Success
What Network Settings Should You Configure for Remote Access?
Configuring the right network settings is a crucial step in enabling remote access to your Raspberry Pi. Without proper network configuration, your device may not be reachable from outside your local network, rendering remote access impossible. The first step is to assign a static IP address to your Raspberry Pi. This ensures that its IP address remains consistent, making it easier to locate on your network. You can configure a static IP by editing the dhcpcd.conf file on your Raspberry Pi. Open the terminal and type sudo nano /etc/dhcpcd.conf, then add the necessary lines to define a static IP address for your device. Save the file and restart the network service using sudo systemctl restart networking. Once your Raspberry Pi has a static IP address, the next step is to configure port forwarding on your router. Port forwarding allows external devices to connect to your Raspberry Pi by directing incoming traffic on specific ports to its IP address. Start by accessing your router’s admin panel, usually via a web browser, and locate the port forwarding section. Add a new rule to forward traffic from a specific external port (e.g., 22 for SSH or 5900 for VNC) to the static IP address of your Raspberry Pi. Be sure to save the changes and test the configuration by attempting to connect to your Raspberry Pi from another device on the same network. Finally, consider using a Dynamic DNS (DDNS) service if your internet service provider assigns you a dynamic public IP address. A DDNS service maps a custom domain name to your changing IP address, making it easier to access your Raspberry Pi without needing to know the current IP. Popular DDNS providers include No-IP and Dynu, both of which offer free plans for personal use. Once you’ve set up a DDNS account, configure your router to update the DDNS service automatically whenever your public IP changes. With these network settings in place, you’ll have a stable and reliable foundation for accessing your Raspberry Pi remotely from anywhere using Windows 10.
Tools and Protocols to Access Raspberry Pi from Windows 10
Once your Raspberry Pi is prepared and your network settings are configured, it’s time to explore the tools and protocols that will enable you to access it remotely from your Windows 10 machine. Among the most popular and reliable options are SSH (Secure Shell), VNC (Virtual Network Computing), and remote desktop applications. Each of these tools serves a unique purpose and caters to different user preferences, whether you’re looking for a text-based interface or a full graphical experience. Understanding how these tools work and their respective advantages will help you choose the best option for your needs. SSH is a protocol that allows you to access your Raspberry Pi’s command-line interface securely. It’s ideal for users who are comfortable working with terminal commands and prefer a lightweight connection. To use SSH, you’ll need an SSH client like PuTTY or the built-in Windows 10 SSH client. Simply enter the IP address or hostname of your Raspberry Pi, along with your login credentials, to establish a connection. SSH is particularly useful for running scripts, managing files, or performing administrative tasks without the overhead of a graphical interface. Its encrypted connection ensures that your data remains secure during transmission. If you prefer a graphical interface, VNC is an excellent choice. VNC allows you to view and interact with your Raspberry Pi’s desktop environment as if you were sitting in front of it. To set up VNC, install a VNC server on your Raspberry Pi, such as RealVNC, and use a VNC viewer application on your Windows 10 machine. Once connected, you can access your Raspberry Pi’s desktop, launch applications, and manage files with ease. While VNC provides a more user-friendly experience, it requires more bandwidth and processing power compared to SSH. By leveraging these tools, you can tailor your remote access setup to suit your preferences and project requirements.
How to Use SSH to Access Raspberry Pi from Windows 10?
SSH (Secure Shell) is one of the most efficient and secure ways to access your Raspberry Pi remotely from a Windows 10 machine. This protocol allows you to establish a command-line connection to your Raspberry Pi, enabling you to execute commands, manage files, and perform administrative tasks without the need for a graphical interface. The process of setting up and using SSH is straightforward, even for beginners, and it offers a lightweight yet powerful way to interact with your device. Here’s a step-by-step guide to help you get started. The first step is to ensure that SSH is enabled on your Raspberry Pi. You can do this by running the sudo raspi-config command and navigating to the "Interfacing Options" menu. Select SSH and enable it. Once enabled, note down the IP address of your Raspberry Pi by typing hostname -I in the terminal. This IP address will be used to connect to your device from Windows 10. Next, open the Command Prompt or PowerShell on your Windows 10 machine and type ssh pi@, replacing ssh-keygen command. Copy the public key to your Raspberry Pi by running ssh-copy-id pi@. After this, you’ll be able to connect to your Raspberry Pi without entering a password. SSH is not only secure but also versatile, allowing you to automate tasks, transfer files using SCP (Secure Copy Protocol), and even tunnel other services. By mastering SSH, you’ll have a reliable and efficient way to manage your Raspberry Pi remotely. Setting Up VNC for a Graphical Interface
For users who prefer a more visual and interactive experience, setting up VNC (Virtual Network Computing) is an excellent option. VNC allows you to access the full desktop environment of your Raspberry Pi from your Windows 10 machine, providing a graphical interface that mirrors the one you’d see if you were physically connected to the device. This setup is particularly useful for managing applications, configuring settings, or troubleshooting issues that require a visual interface. The process of setting up VNC involves installing a VNC server on your Raspberry Pi and using a VNC viewer on your Windows 10 computer to establish the connection. To begin, ensure that VNC is enabled on your Raspberry Pi. You can do this by running the sudo raspi-config command and navigating to